Plywood vs. Solid Wood: Which is Best for Your Project?
The Bottom Line:
Before diving into your next woodworking project, let's break down what each material brings to the table.
Plywood offers key advantages:
Costs less than solid lumber
More stable in varying humidity
Maintains consistent strength across sheets
Comes in standard, easy-to-find sizes
Performs reliably in changing conditions
Solid wood brings its own strengths:
Shows unique, natural grain patterns
Can be refinished multiple times
Handles heavy use exceptionally well
Carries traditional craftsmanship appeal
Before making your choice, consider:
How the piece will be used
Your project budget
Where it will be installed
Expected lifespan
Environmental conditions
Often, the smartest approach combines both materials, using each one where its strengths matter most. Understanding these differences helps you make choices that lead to successful projects that look great and last long.
Plywood vs. Solid Wood
When it comes to woodworking, choosing between plywood and solid wood shapes everything that follows. Plywood combines layers of thin wood into stable sheets that resist warping and cover large areas efficiently. Solid wood, cut straight from logs, brings natural beauty and strength that can last for generations.
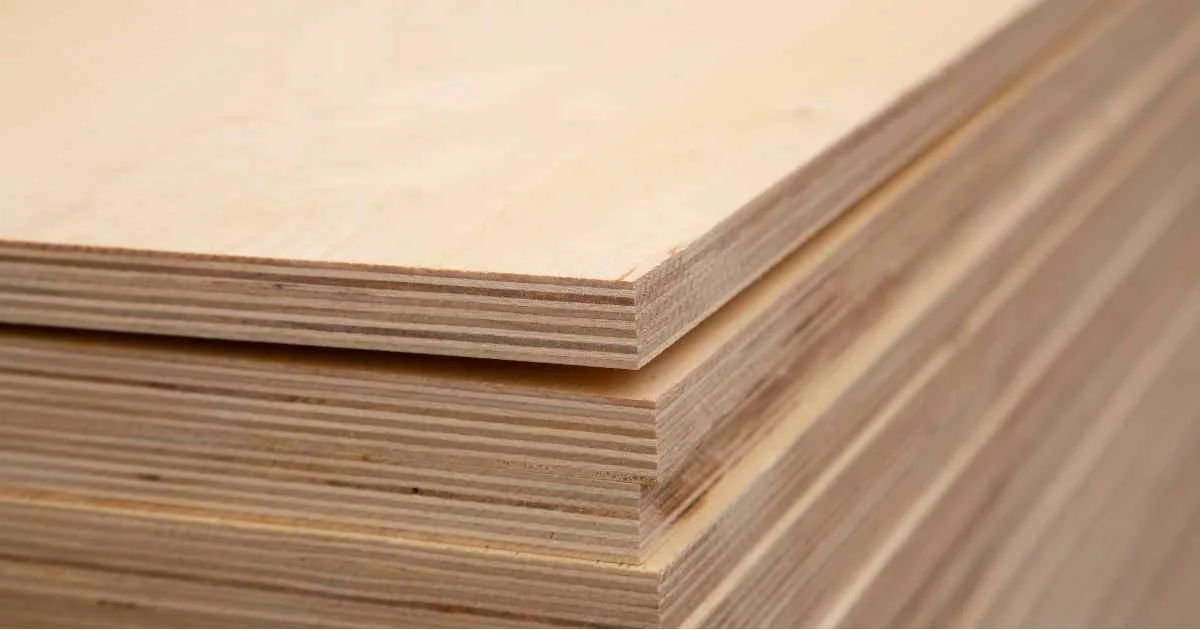
Understanding Plywood
Think of plywood like a sandwich made of wood layers. Each layer runs opposite to the ones next to it, creating strength in all directions. Manufacturers use strong glues to hold these layers together, helping panels stay flat even when humidity changes.
Different types serve different needs. Cabinet-grade plywood shows smooth faces perfect for furniture. Marine-grade stands up to moisture without falling apart. Construction grade offers good strength for basic building.
Plywood brings several advantages to your shop. Large sheets cover big areas with consistent thickness throughout. The layered construction helps it stay flat when regular wood might warp.
While it costs less than solid wood, plywood does have some drawbacks. You'll need to cover the edges where layers show, and you can't sand it too deeply without hitting the next layer. When surfaces crack, repairs prove trickier than with solid wood.
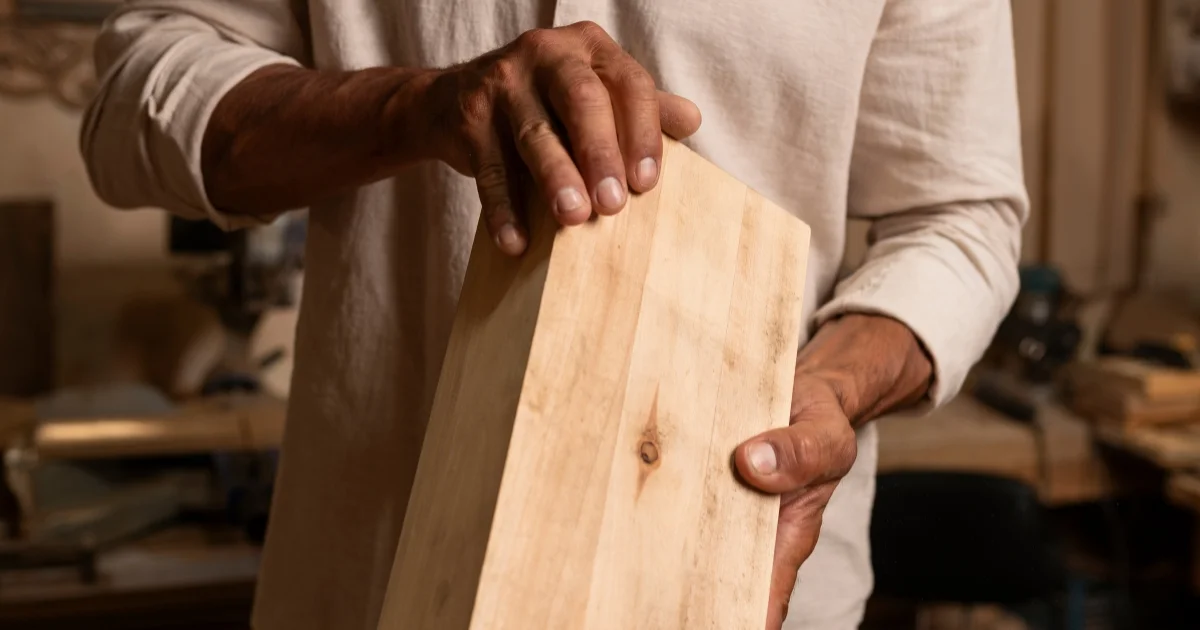
Understanding Solid Wood
Solid wood brings character to your projects through unique grain patterns and natural colours. Working with solid wood requires understanding its natural properties. Wood moves with seasonal changes in humidity, expanding and contracting across its width. This movement means you'll need to plan your joints and assemblies carefully. However, solid wood rewards this extra care with superior strength and the ability to be refinished multiple times.
The Choice Depends on Your Project
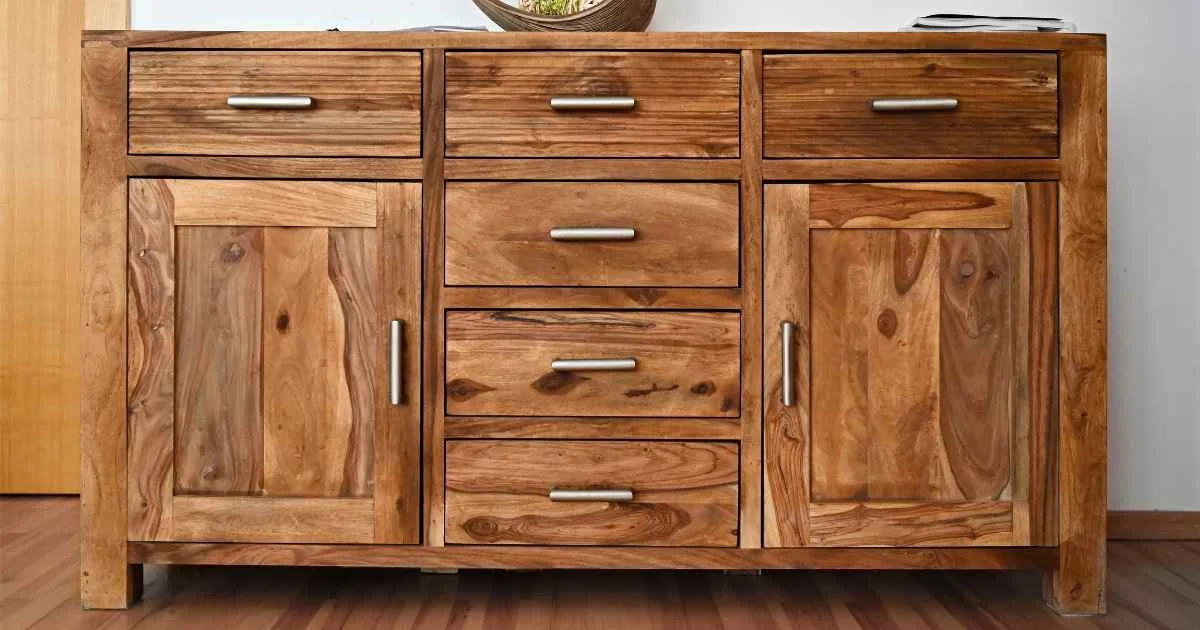
Smart woodworkers often combine both materials in a single project. Kitchen cabinets might use plywood for the boxes where stability matters most, while solid wood creates durable face frames and doors that people touch every day. Tables often feature solid wood tops that can be refinished when damaged, while hidden structural elements might use plywood to save money without sacrificing strength.
Pick your material based on how each piece will be used. Consider whether the wood will show in the final project, how much wear it needs to handle, and what conditions it will face. Match these needs with each material's strengths, and you'll create pieces that work well and last for years.
For more information on the qualities of specific woods like oak, check out our blog on Crafting with Oak.
Working with Each Material
Each material demands its own approach in the workshop. Plywood requires special care during cutting to keep those thin face veneers looking good. You'll want razor-sharp blades on your table saw – standard blades can tear up the edges pretty badly. Most pros recommend special plywood-cutting blades that reduce splintering.
A good trick is to always cut with the best-looking face up, which helps prevent the bottom layer from getting ragged. Solid wood plays by different rules. Unlike plywood, it's going to move with the seasons as humidity changes – that's just wood being wood. This means paying attention to grain direction when you're planning cuts and joints.
The nice thing about solid wood is how well it works with hand tools. Run a sharp plane across solid wood, and it'll leave a surface that practically glows. Try that with plywood, and you'll just tear through the veneer. When it comes to joining pieces together, each material needs its own approach.
Plywood works great with screws; Solid wood opens up more traditional options. Mortise and tenon joints or dovetails might take longer to make, but they actually get stronger over time as the wood moves naturally. These classic joints have been proving themselves for centuries.
Key Comparisons Between Plywood and Solid Wood
Performance differences show up clearly in use. Plywood maintains consistent strength across large areas and handles moisture better than solid wood. It stays more stable in changing conditions, making it ideal for areas with varying humidity. Solid wood excels in pieces that get heavy use, like table tops and chair parts. It allows repairs that can keep it looking good for generations.
Cost Considerations
The price difference between plywood and solid wood affects every project's bottom line, especially for large areas. This initial savings makes plywood attractive for bigger projects.
Choosing the Right Material
The material you choose should align with your project’s purpose. Ask yourself: Will the wood be on display? How much wear and tear will it face? For hidden parts, plywood can be a cost-effective option, allowing you to save solid wood for visible areas that need durability and aesthetic appeal.
Also, consider the lifespan of your project. Plywood is great for shorter-term needs, while solid wood is ideal for heirloom pieces meant to last generations. Location is another key factor. Plywood performs better in areas with fluctuating conditions, making it a smart choice for kitchens or bathrooms where moisture levels change frequently.
Solid wood, on the other hand, thrives in more stable environments but can still withstand tough conditions with proper care and maintenance. Finally, achieving a polished finish depends on proper machining techniques, especially with solid wood. For expert tips on creating smooth, professional results, check out Machining Wood: Tips and Tricks for a Smooth Finish.
Budget Planning
Smart planning helps control costs without cutting quality. For plywood projects, buying full sheets often saves money even if you have some waste. With solid wood, buying rough lumber and milling it yourself costs less but requires more tools and time.
Hidden costs affect your total project price. Quality blades for cutting plywood add to your costs, while solid wood often needs more clamps and special tools for joinery. Both materials need finishing products, though solid wood typically requires more extensive finishing. Plan for these extra costs when budgeting.
Practical Examples
Kitchen cabinets show how both materials work together well. Cabinet boxes use plywood because they need to stay flat and stable. Face frames and doors often use solid wood since people see and touch them daily. This mix gives you the best of both materials while controlling costs.
Tables demonstrate why material choice matters so much. Tabletops made from solid wood can take sanding and refinishing when they get damaged. The base might use plywood in hidden spots to save money without losing strength. Chairs almost always need solid wood because they take so much stress.
Storage projects like closets and garage cabinets usually work best with plywood. It comes in big sheets that make building boxes easy, and it stays flat even when temperatures change. Adding solid wood edges makes them look better and protects the plywood edges from damage.
Finding the Right Fit for Your Project
Both materials have their advantages, and many great projects actually use a combination of the two. Plywood gives you cost-effective stability, while solid wood brings lasting beauty and strength. Smart material choices go a long way toward project success, whether you're watching your budget, focused on function, or aiming for that perfect look.
Getting a project that lasts (and looks great) comes down to using the right material in the right place. Plywood works wonders for structural parts, while solid wood really shines where you can see and touch it. Mix them thoughtfully, and you'll get the best of both worlds.
Ready to start your next woodworking project? Come by our showroom and get your hands on our plywood and solid wood options. Our team knows these materials inside and out and can help you pick what works best for your needs.
We keep a solid stock of different grades and species for all kinds of projects. Drop in or give us a call – we're here to help you build something that lasts.
Maximizing Space with Smart Corner Cabinet Accessories
The Bottom Line:
Corner cabinet accessories are a modern solution to maximize space.
Data-driven trend: Industry reports show that the business of cabinet hardware and accessories is on the rise: Cabinet Hardware Market Size, Share, Growth, Forecast 2031.
Why our hardware is the modern solution: We offer a variety of innovative cabinet accessories to maximize space and style.
Organization tips:
- Fly Moon Mechanisms help utilize corner cabinet space with attachable shelves that can fly outward, allowing ease of access.
- Swivel Carousels offer peak organization by taking a simple shelf that swivels around, allowing for full access to anything in the cabinet.
- Smart Corner technology allows easy access to further cabinets in one single motion.
Keeping a kitchen organized is no easy task. Crafting a space that makes things easy for homeowners is essential. Narrow drawers, shallow shelves, and bulky appliances are all blockers to having the organized kitchen of your dreams.
While a little disorganization might seem harmless, homeowners are busy people who need modern solutions. Craftsmen Hardwoods has the solution: cabinet accessories.
Corner cabinets, in particular, can be a real challenge. They tend to be deeper than typical cabinets, making things hard to reach in the back. Their valuable cabinet space is often tucked away from view, meaning you could miss out on a sweet spot for your kitchen appliances.
The good news is that there are plenty of easy ways to restore some order to those corner cabinets. Our cabinet accessories can help maximize space while making life easier for homeowners on busy days.
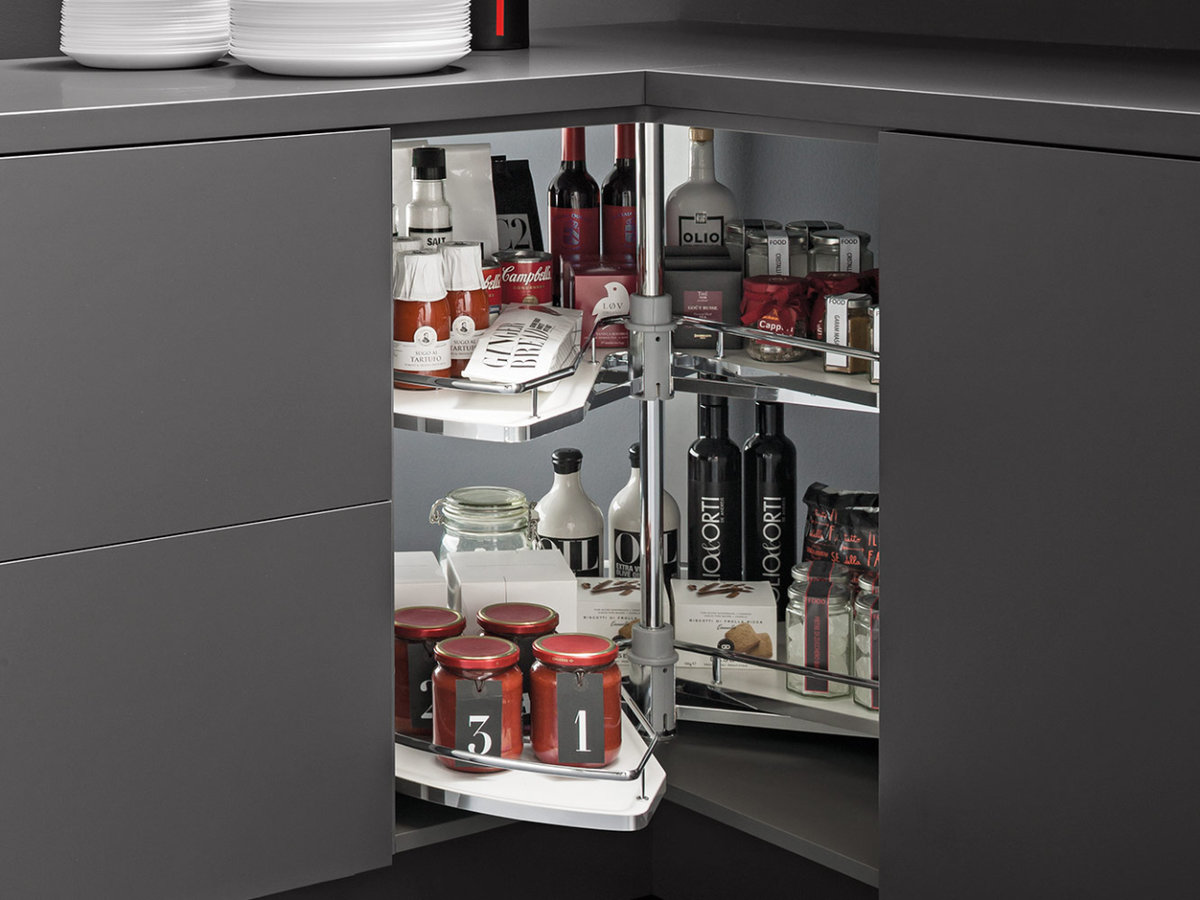
What is a Corner Cabinet?
Sometimes called a “blind cabinet” or “blind corner cabinet,” these cabinets are the equivalent of two sets of cabinets that meet at a 90-degree angle. While it helps provide additional cabinet space, they are notoriously difficult to access, often leading to wasted storage space and frustration on behalf of homeowners.
However, with the addition of some smart accessories, these cabinets can be optimized for organization while maximizing space.
Fly Moon Mechanism
Fly Moon Mechanism is a corner cabinet organizer with a unique rotating and swing structure. This special design allows for more accessible storage even in the most hard-to-reach places, particularly when it comes to corner kitchen cabinets.
How It Works:
Rotating Shelves: Our fly moon mechanism can mount a set of shelves that rotate or “fly” out of the cabinet.
Space Maximization: This mechanism is perfect for maximizing storage in a deep/corner cabinet, making it much easier to reach items stored in the back without having to dig through everything in the front to get what you need.
Smooth Motion: Our fly moon mechanism is the highest quality and has soft-close, smooth gliding technology, allowing for seamless operation.
Why It's Useful:
The fly moon mechanism is a great solution for kitchens that require more efficient use of space. By utilizing an otherwise wasted corner space, this organization technology creates ease, organization, and accessibility in any kitchen.
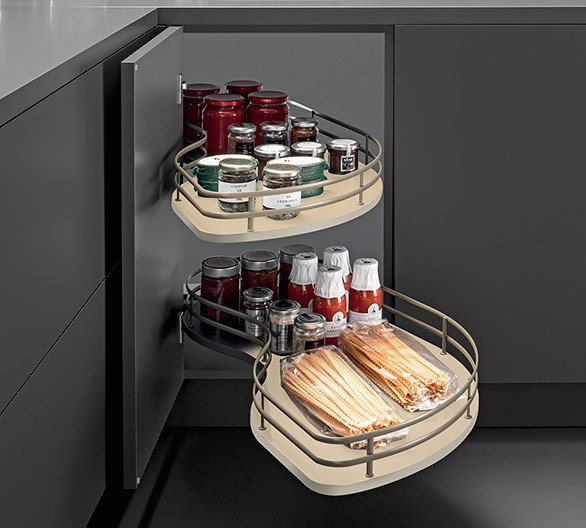
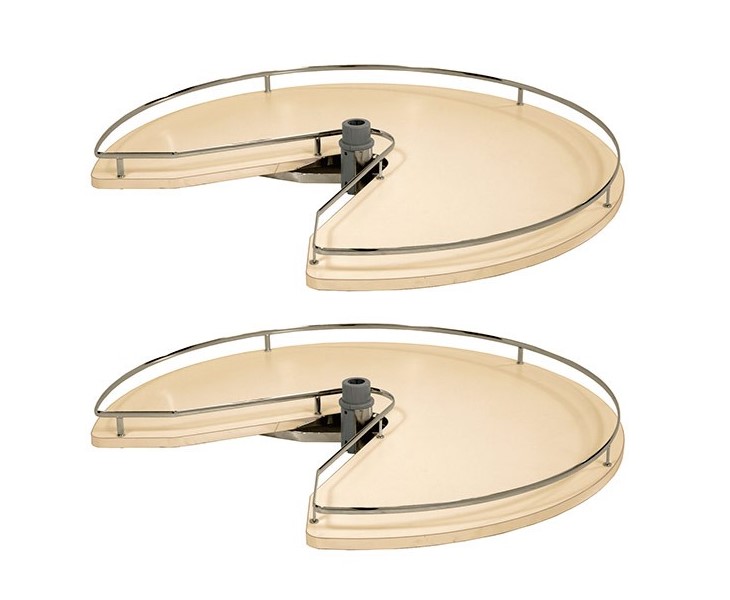
Swivel Carousel
Swivel Carousels are a perfect solution for corner cabinets and can be used both with a frame or frameless cabinet. These shelves are designed to spin with the cabinet, allowing for easy organization.
How It Works:
Independently Rotating Shelves: Each shelf can be rotated independently, meaning access to even far-back items is easy and seamless.
Non-Slip Melamine Surface: Melamine-coated materials prevent items from slipping on the surface, making them perfect for storing several kitchen items and appliances.
Why It’s Useful:
Because each shelf can be swiveled independently, it’s much easier to organize and access the cabinet space. The melamine coating makes the shelves easy to clean, so homeowners don’t have to worry about accidental spills. Plus, the shelves are specially crafted to be durable, meaning your initial investment will last into the future.
Smart Corner
Smart Corner systems fully extend and utilize soft-closing technology, ensuring safe and effortless storage solutions for corner cabinets.
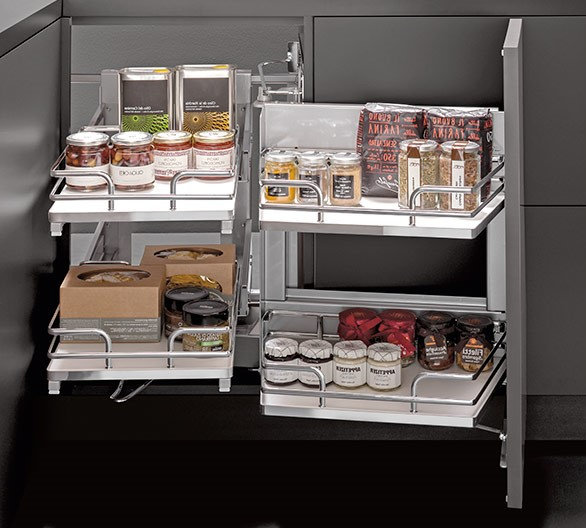
How It Works:
Easy Use: The Smart Corner opens in one simple movement, allowing easy access to rear baskets.
Full Extension, Soft Closing System: The unit fully extends out and has soft-closing technology, maximizing storage.
Why It's Useful:
The unit is easy to assemble and provides full access to storage space. It makes use of the limited corner space, allowing for better organization.
Additional Considerations and Kitchen Organization Tips
Before you embark on your next corner cabinet project, there are several considerations you must bear in mind, including some unique challenges and opportunities.
Opportunities:
Unique opportunity to further optimize kitchen space.
Additional storage is often “hidden”, out of sight, out of mind. Making the kitchen look tidier.
Provides ability for more customization.
Adds a surprise element to a project.
Challenges:
Installation can sometimes be more complex than other cabinet designs.
Some corner cabinet designs are difficult to access, making adding accessories a challenge.
Maintenance can occasionally be difficult in harder to reach spaces.
Extra Tips
Optimize with Cabinet Organizers: There are plenty of wooden and plastic inserts that can be added to cabinet space to help organize and optimize the space you choose.
Add Hidden Trash Disposal: Maybe you decide the best use of the kitchen space is to put a hidden trash disposal unit tucked away in that secretive little corner. This could allow you to focus on storage space optimization elsewhere.
Create Open Corner Shelving: Make use of your corners with hardwood corner shelving units that allow you to level up the kitchen’s storage game. This is perfect for homeowners who need quick access to everyday food products, ingredients, utensils, and more.
Include a Glass Corner Display Cabinet: Maybe your project calls for something different. A raised, glass corner display cabinet is a popular use of corner space in country-style kitchens.
Add Storage Baskets: Depending on the size and depth of the corner cabinet, installing baskets is a great way to make use of space while keeping things clean and organized.
Build with Intention: When choosing a design and purpose for your corner cabinet, do so with intention. Make a solid plan for the cabinet’s function and what you plan to store there so you can optimize it based on size, depth, and accessories.
Craftsmen Hardwoods - Choose Excellence
Craftsmen Hardwoods take great pride in our hardwood and soft lumber products and expertise. Since we began in 1996, we’ve made a name for ourselves as a renowned provider of hardwood and softwood lumber products.
Our goal is that we always exceed your expectations by providing the best products and solutions.
You can trust that our climate-controlled warehouse will ensure all our products are in perfect condition, even our more exotic and unique items.
For whatever your hardwood and soft lumber needs, Craftsmen Hardwoods has what you need. Our large variety of options means we can help match your next home improvement project with the right product that has the look and functionality you desire.
We have everything you could want from kitchen accessories, hardwood, soft wood hinges and plates, and sheet goods.
Contact us today to receive a quote for your next project.
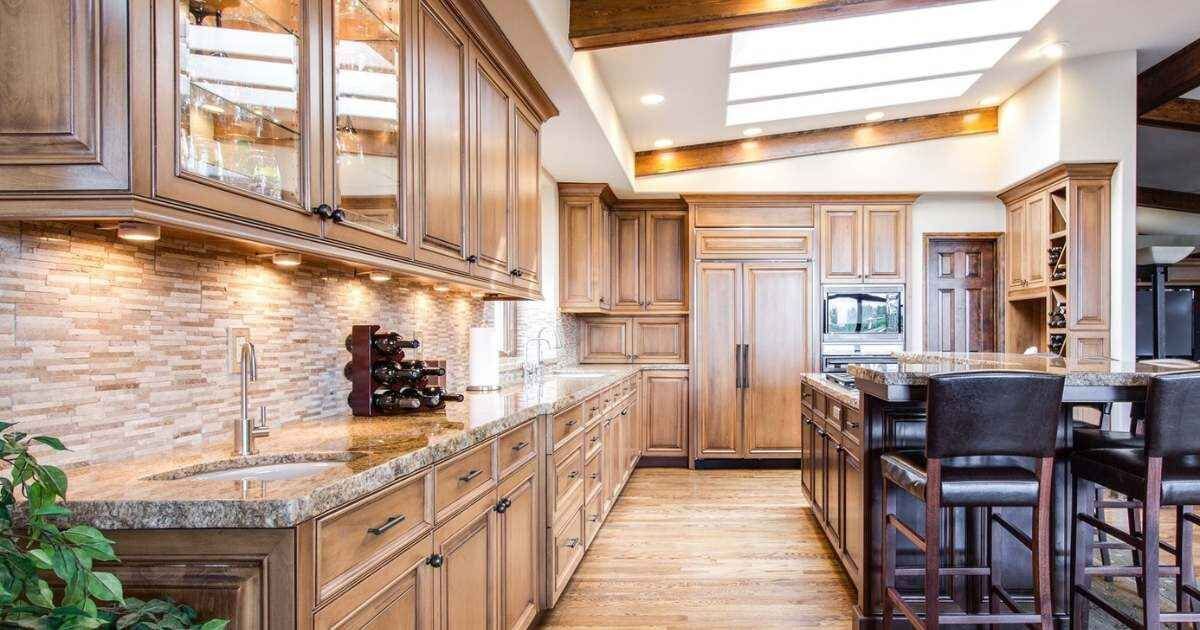
The Wooden Kitchen Revival Why Wood Cabinetry is Back
The Bottom Line:
- Wood is back: Homeowners are moving away from painted finishes and embracing wood cabinetry's natural warmth and texture.
- Data-driven trend: The resurgence of wood kitchen cabinets is supported by industry reports (including the NKBA/KBIS 2024 Kitchen Trends Report and 2023 U.S. Houzz Kitchen Trends Study) and feedback from designers, manufacturers, and builders.
- Why wood works: Wood offers warmth, personalization, a connection to nature, durability, and longevity.
- Design tips:
- Mix wood with painted surfaces for a two-toned look.
- Choose warm, neutral wood tones like white oak and walnut.
- Pair wood with other natural materials like stone and metal.
- Incorporate modern features like under-cabinet lighting and island outlets.
- Offer custom storage solutions to enhance functionality.
- Customize designs to meet each client's unique preferences.
Kitchen design is changing. After years of sleek, white kitchens being the most popular choice, wood, a warmer, more inviting material is making a comeback. And that's great news for skilled woodworkers and cabinetmakers.
While wood has always been a classic choice for kitchen cabinets, the past few years have seen trends favour painted or laminated finishes in cool tones. Now, however, we're seeing homeowners fall back in love with wood's natural warmth and texture.
Kitchen Trends of Then and Now
Wood cabinetry has a long and colourful history, with trends coming and going like clockwork.
The 1970s embraced harvest gold and knotty pine, while the 1980s went for the modern look of Euro-style laminate. The 1990s loved oak and cherry, and the early 2000s were all about deep 'espresso' tones. More recently, all-white kitchens have been all the rage.
Now, many homeowners are rediscovering the timeless appeal of wood in its purest form. They're choosing finishes that let the wood's natural beauty shine through – every grain, every knot, every unique detail.
It's not just a hunch – the numbers prove it. The National Kitchen & Bath Association's 2024 Kitchen Trends Report reveals a significant rise in homeowners choosing these warm wood finishes over painted options. Houzz's 2023 Kitchen Trends report shows the same thing.
Designers, manufacturers, and builders across Ontario tell us the same story: people are craving cabinets that highlight the natural beauty of wood. Whether solid wood or wood laminate that convincingly mimics the real thing, the key is achieving that warm, organic feel.
So, which wood types are leading the pack? Walnut, with its deep, warm tones, and white oak, with its light and airy feel, are the top picks for wood cabinets right now. They're both beautiful, versatile, and full of character – a perfect combination for creating the kitchen of your clients' dreams.
Why Wood Always Works
So, why are homeowners choosing wood? It boils down to this:
Warmth and Personalization
Wood brings instant warmth and character to a kitchen. Unlike the sometimes-cold feel of painted cabinets, wood brings a natural richness and depth that can be customized (through staining) to match any homeowner's style.
Comfort in a Tech-Driven World
In our increasingly tech-filled lives, people seek spaces that feel grounded and comforting. Wood kitchens provide a welcome escape from the cold glow of screens, creating a warm and inviting space to gather with family and friends.
Connection to Nature
It's no secret that spending time in nature is good for us, but studies show we're spending more time indoors than ever before. Wood cabinets can bring a piece of the outdoors into our kitchens, creating a space that feels a little more connected to the natural world.
Durability and Longevity
Let's face it – kitchens are high-traffic areas. Solid wood cabinet doors, especially with proper care, can withstand daily wear and tear better than painted surfaces. A scratch on wood is less noticeable and easier to repair than a chip in paint. This durability translates to long-term value and a timeless appeal that homeowners appreciate.
Designing with Wood: Tips & Tricks
Want to make the most of this welcome upward trend? Here are some design tips for incorporating solid wood cabinetry into today's design sensibilities.
Mix and Match
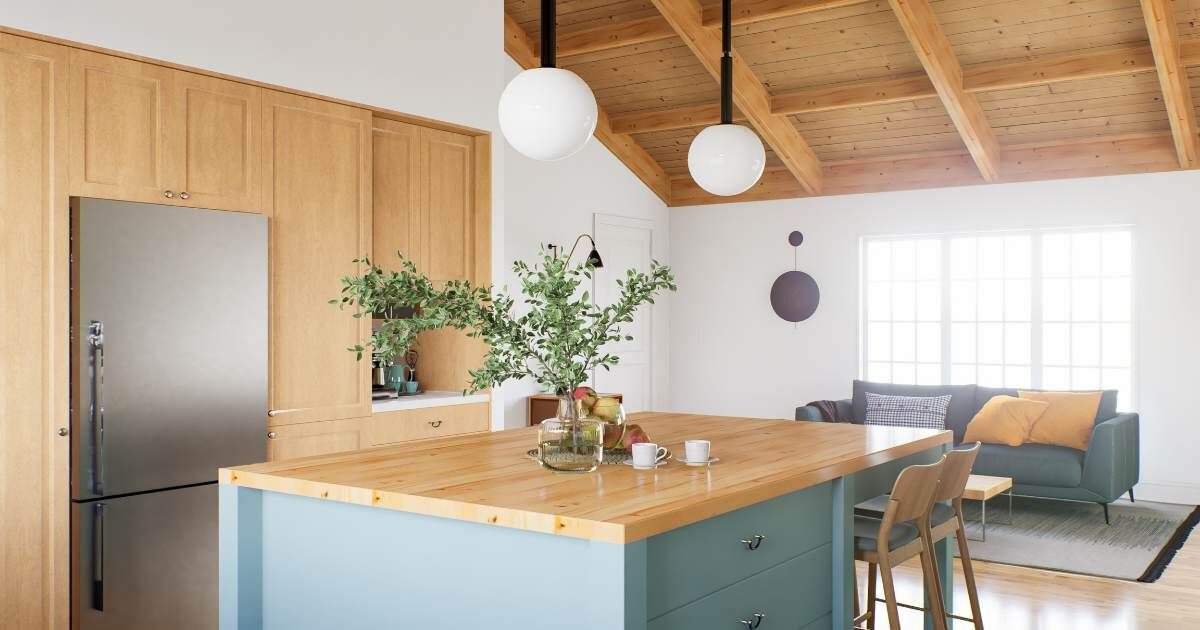
Don't be afraid to combine wood with painted surfaces. Two-toned kitchens, with wood on the lower cabinets and complementary paint on the uppers, are a popular and stylish choice.
For your clients, a two-tone kitchen can be a way to express their unique style while keeping the space functional and inviting. Some of the most popular mix-and-match combos include:
Upper and Lower Cabinets: Go classic with a lighter wood on top for an airy feel and a darker wood on the bottom for a grounded look.
Island and Surrounding Cabinets: Make the kitchen island pop with a different colour or finish contrasting with the surrounding cabinets.
Accent Cabinets and Statement Pieces: Designate a specific area, like a pantry or coffee station, as a visual highlight with a distinct colour or finish.
Don't limit yourself to just colour. Consider incorporating different wood species or finishes – for example, pairing smooth, painted cabinets with textured wood grain. The possibilities are virtually endless.
Warm it Up
The right wood tone sets the foundation for a warm and inviting kitchen. While everyone has their own preferences, some woods are just naturally cozy.
Woods like white oak, walnut, cherry, and maple have warm undertones that work well with many styles. Even without any staining, they can make a space feel more inviting.
For wall colours and backsplashes, opt for light neutrals like creams, soft greys, or warm beige, which are perfect for pairing with wood cabinets. They complement the wood's natural warmth without competing for attention.
Natural Pairings
Wood can stand alone, but it doesn't have to. Pairing it with other natural materials can create an even more beautiful and inviting kitchen.
Stone: Granite or marble countertops are a classic pairing with wood cabinets. Their unique patterns and veining add a touch of luxury to any kitchen.
Metal: The cool touch of metal adds a modern edge to wood cabinetry. Black matte hardware complements darker stains like espresso, while bright silver accents pop against deeper tones. Consider unlacquered brass for a touch of warmth or aged bronze for a vintage feel.
Other Woods: Don't be afraid to mix and match wood types! Combining light and dark woods or different textures creates a more interesting and layered look. For a statement piece, try using a different wood for your island or open shelves.
Live Edge: For a truly show-stopping centerpiece, consider incorporating a live edge wood island. This unique, organic element will bring a touch of the wild indoors and become a conversation starter in any kitchen. (Need help sourcing live edge lumber ? We've got you covered!)
Add Modern Features
Wood cabinets don't have to be old-fashioned. You can easily blend technology into your design, giving your clients the warmth of wood along with all the latest conveniences, like:
Under-Cabinet Lighting: Touch-activated or motion-sensing LED lights under cabinets are both practical and aesthetically pleasing. They provide ample task lighting for meal prep and create a warm ambience in the evenings. Plus, they showcase backsplash details beautifully.
Island Outlets: Exterior outlets on kitchen islands are becoming a must-have for homeowners who want easy access to power for appliances and gadgets. While in-drawer and in-cabinet outlets aren't currently up to code in Ontario, creative solutions can still integrate power seamlessly into island designs.
Storage Solutions
Homeowners love smart storage. Offering functional storage solutions makes their lives easier and adds value to your work. Think about:
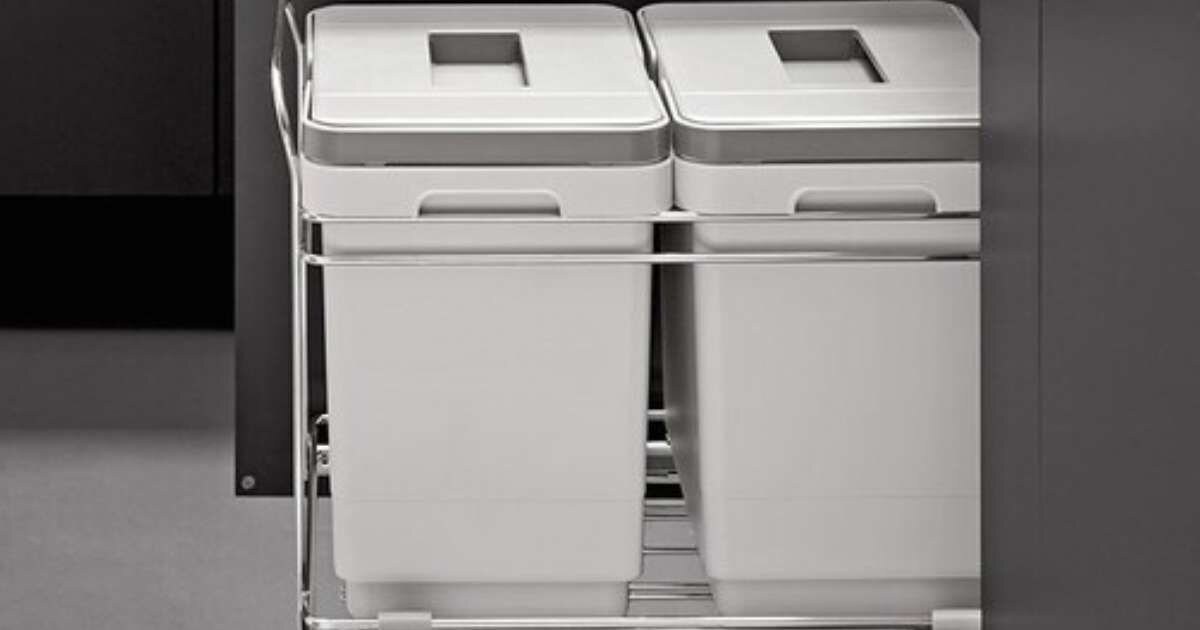
Pull-Out Waste Bins: Tuck unsightly trash away with pull-out bins that integrate seamlessly into cabinetry. This frees up floor space and makes waste disposal a breeze.
Cutlery Organizers: Practical designed cutlery dividers keep utensils organized and within easy reach. They look great, match the solid wood interior of the cabinets, and make unloading the dishwasher a joy instead of a chore.
Pantry Drawers: Slide-out pantry drawers are a game-changer for keeping pantries tidy and accessible. They maximize space, prevent items from getting lost in the back, and offer a clear view of what's on hand.
Customization is Key
Every client is unique, we understand that you want the customization to suit their own personalized style. Work with them to design cabinetry that fits their needs and lifestyle, whether a rustic farmhouse kitchen or a sleek, modern space.
Make the Most of the Wooden Kitchen Revival
We believe the wooden kitchen revival is more than just a passing fad. Everyone wants that sense of warmth, authenticity, and connection to nature in their homes. Homeowners are looking for spaces that tell a story and reflect their values and personal style, and nothing does that like custom-built wood cabinets.
If you're looking for high-quality lumber and woodworking accessories to meet the growing demand for wood cabinetry, look no further than Craftsmen Hardwoods. We offer a wide selection of materials and expert advice to help you bring your clients' visions to life. Contact us today and let's build something beautiful together.
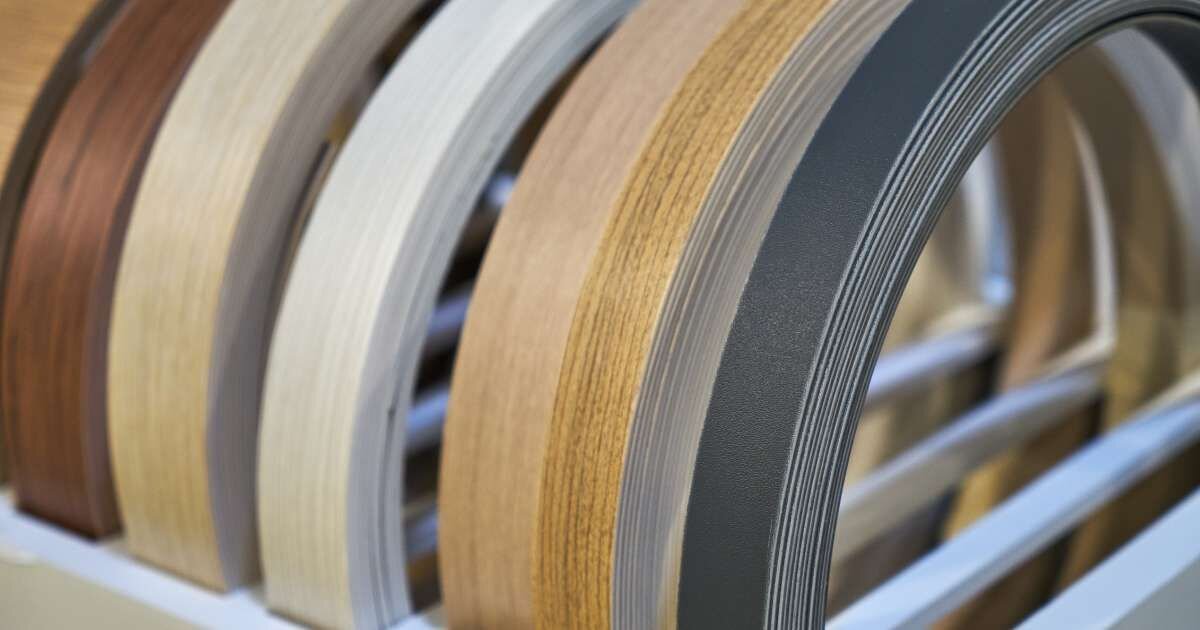
The Art of Edgebanding with Wood Veneer and PVC
The Bottom Line:
- What is Edgebanding? Edgebanding covers up the unattractive edges of boards made from materials like particleboard or MDF, making them look clean and protecting them from damage.
- Types of edgebanding include real wood veneer, plastic (PVC), and melamine. There are other options, but we will cover these.
- Edgebanding comes in different thicknesses. Thin ones are good for a sleek look, medium ones are versatile, and thick ones offer extra protection for heavy use.
- Zero-joint edgebanding technology allows for edgebanding that merges perfectly with the board, leaving no gaps or visible lines for a super clean look.
- Tips for Success: Start simple, use tape if you don’t have expensive clamps to hold edgebanding in place, keep your glue and materials at a comfy room temperature, clean your tools regularly, and always choose high quality edgebanding for the best finish.
When woodworkers started using MDF in place of the pricier solid wood, we all hit the same snag: how to hide those ugly edges. And it's not just about looks, because those rough edges can chip, let in moisture, and before you know it, your hard work starts to fall apart.
Edgebanding gives manufactured sheets that finished look we are all looking for. But getting it's got to be just right, or it'll stick out like a sore thumb. You've probably noticed how even the smallest mistake can make a big difference. Once you see a gap or a bit of glue that shouldn't be there, you can't unsee it.
We all want our work to look as perfect as possible, not just for our own satisfaction, but because the folks we're making it for expect nothing less.
So, whether you're wondering what materials to choose, about the best adhesive to use, or just looking for some pointers to up your game, let’s talk about edgebanding.
Edgebanding with Hardwood Veneer
Choosing the right edgebanding is key when it comes to fine furniture, custom cabinetry, or any woodworking project that demands top-notch appearance. You want to match the wood type, of course, but also the grain pattern and colour.
Wood veneer banding comes in two types: non-glued (raw wood) or pre-glued. Prefinished has a sealer and topcoat already applied, which can save you a step if you're looking to get to the finish line a bit faster.
Craftsmen Hardwoods offers both pre-glued and non-glued veneer edgebanding.
You can also find many species of wood banding with a thin backing, like fleece or paper, to prevent it from splitting.
Alternatives to Veneer Edgebanding
While veneer and solid wood are our go-to materials, there’s a whole world of colourful bands out there, including PVC and melamine.
PVC Edgebanding
PVC (polyvinyl chloride) is a budget-friendly option that's common in the furniture world. Its colour goes all the way through, which comes in handy when you're cleaning up those edges. PVC Edgebanding is suitable for all straight-line and contour edgebanding applications.
When you think of PVC, black or white are probably the colours that come to mind. However, PVC edgebanding is available in a huge variety of colors and textures. Look at our Benjamin Moore colour match collection—you’ll find everything from teal to navy to olive. We also have paintable PVC edgebanding which you can spray or hand-paint to match your finished piece.
Edgebanding Thickness
Edgebanding is available in a wide range of thicknesses, from as thin as 0.4mm (about 0.02 in) to as thick as 3mm (about 0.12 in) or more. Choosing the right thickness depends on the project's specific requirements and the intended outcome. Here are the general guidelines.
- Thin Edgebanding (0.4mm to 1mm): This is the most commonly used size range and the go-to when you’re aiming for that sleek, almost invisible edge. It’s perfect for furniture that’s all about finesse or if you’re shooting for that minimalist vibe. Plus, it’s flexible, bending around curves without putting up a fight.
- Medium Edgebanding (1mm to 2mm): This is your middle-of-the-road option that does a bit of everything. It's got enough muscle to protect the edges of your project but keeps things looking sharp. For most furniture and cabinetry work, this is your sweet spot. It’s reliable and versatile.
- Thick Edgebanding (2mm and above): This is what you want when you’re building something that needs to stand up to a beating. Commercial settings, high-use furniture – thick edgebanding has got it covered. It’s great for hiding those not-so-perfect edges too. The trade-off is that it’s a bit stiffer and more noticeable.
It’s also important to consider the material of the substrate, the type of edgebanding application (straight, curved, post-formed), and the desired look and design of the project. Sometimes, going thicker gives you that extra durability and hides the rough spots, but it can also change the feel and look of your piece.
Making It Stick
Whether you're sticking with the tried-and-true or looking for the cutting edge, knowing your options can make all the difference in your edgebanding projects.
Edgebanding Adhesives
Whether you're working out of a garage or running a full-scale shop, the basics of sticking edgebanding to your projects pretty much stay the same. You're mainly looking at a few types of hot-melt glue: ethylene vinyl acetate (EVA), polyurethane (PUR), and amorphous polyolefin (APO).
- EVA works a lot like the white and yellow wood glues we've all used, except it's heat-activated. This means it sets faster than those water-based glues we're used to, but it's not without its downsides. EVA creates a mechanical bond, which is strong but can re-melt under heat, something to think about depending on where your project will live.
- PUR is newer and pricier but gaining in popularity. PUR grabs onto your edgebanding and the substrate fast, creating a solid layer in seconds. Over the next couple of days, it reacts with the moisture in the air to form a super-strong, chemical bond. This bond is tough against heat and moisture, making it perfect for places like bathrooms and kitchens. Plus, it's less visible and doesn't re-melt, keeping your edges looking sharp and clean.
- APO is like EVA but doesn't handle heat or chemicals well. Where it shines is in customization, as you can adjust its hardness, stickiness, and curing time, making it great for working with paper and fabric.
Zero-Joint Edgebanding
The bane of any edgebanding job is that visible glue line that seems to attract dirt like a magnet. Zero-joint technology offers a solution.
Zero-joint edgebanding uses a pre-applied polymer layer that bonds to your board without traditional glue. Whether it's activated by laser, hot air, or NIR, this method melts the functional layer and fuses the edgeband directly to the board. Suddenly, you've got a seamless surface that looks like one piece, with no glue lines in sight.
Edgebanding Tips
Let's talk shop and dive into some edgebanding tips.
1. Start Small
If you're new to the edgebanding world, don't feel like you have to go all out with a fancy machine right off the bat. Iron-on/preglued edge tape is a great starting point. From there, you can try a portable edgebander.
As you gain experience and tackle more edgebanding projects, you might consider leveling up to a machine that doesn't just apply the band but also trims, softens edges, and even integrates with a CNC setup for a slick, almost hands-off operation.
Once you've got a couple of projects under your belt, you might consider leveling up to a machine that doesn't just apply the band but also trims, softens edges, and even integrates with a CNC setup for a slick, almost hands-off operation.
2. Save on Edge Clamps
For those of you working with solid wood edgebanding, you know the struggle of keeping it in place while the glue sets. Edge clamps can get pricey, and sometimes brad nails just aren't an option.
Grab some masking tape. Stretching a 4″ to 5″ piece over the edge every few inches can give you enough clamping pressure to secure that banding nicely, saving you from spending a small fortune on clamps.
3. Watch the Temperature
Glue-line failures are often down to not using enough glue, using glue that's too cold, or working in a space that's too chilly. The fix? Keep your glue and edgebanding in a spot that's warm, but not hot, to ensure everything bonds like it should.
4. Keep It Clean
Using an automatic or semi-automatic edge-bander? Keeping your machine clean is important. After you've got the bearings and cutters clean, consider using a product designed to prevent glue build-up. It's a simple step that can save you from a world of frustration by keeping those jams at bay.
5. Use Quality Edgebanding
Don't skimp on the quality of your edgebanding. High-quality materials make a big difference in the result. We've got you covered with wood veneer, PVC, and melamine options. Whether you're aiming for a custom look or a perfect match with your panel material, going for the good stuff will help you achieve the finish you're after.
Final Thoughts
We've covered the importance of choosing the right materials, whether you're leaning towards the natural warmth of hardwood or exploring the versatility of alternatives like PVC and shared some practical tips and tricks to help you tackle common challenges. However, we understand you may still have questions.
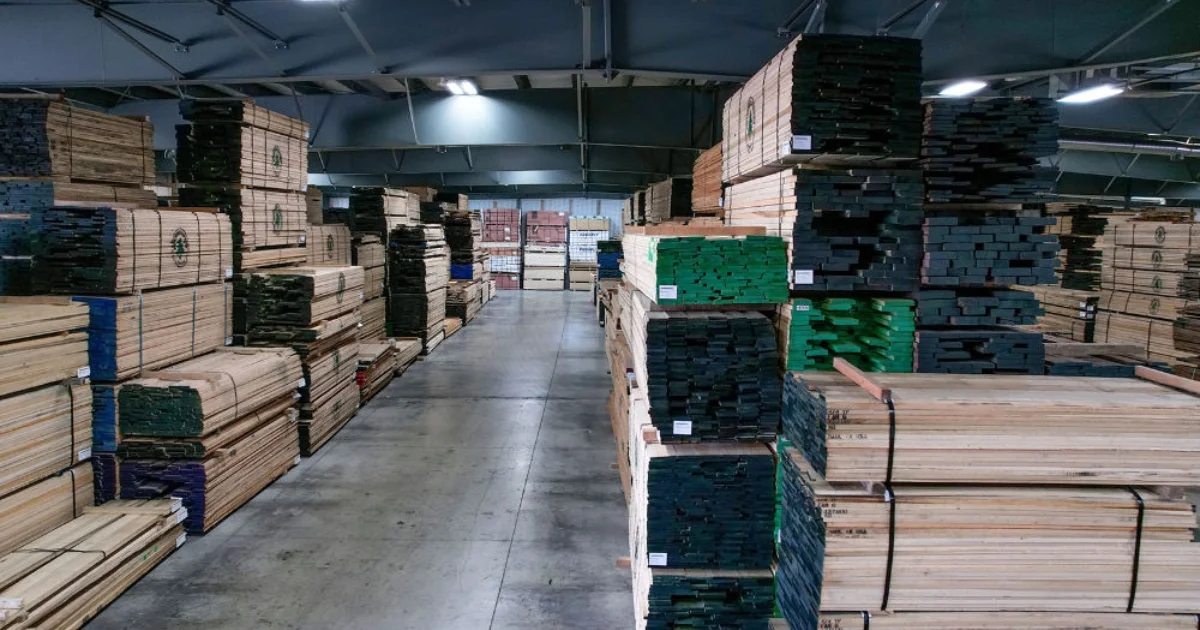
Craftsmen Hardwood, a wood products and services provider based in Drayton, Ontario, has grown significantly since its inception in 1996. We operate from a 35,000 sq. ft. warehouse in Drayton's Industrial Park. We are known for our dependable service and quality products. Whether you’re interested in learning more about woodworking or having a custom cabinetry project in mind, call us or contact us online. We are happy to help!
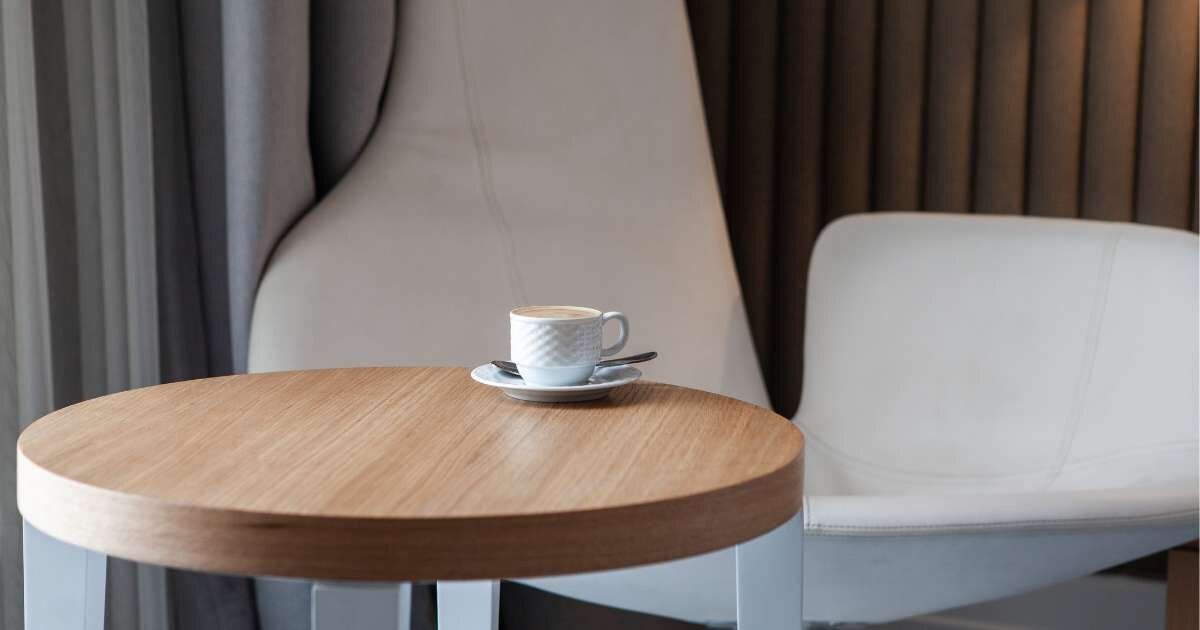
Crafting with Oak: A Timeless Choice for Woodworking Projects
We are Craftsmen Hardwood, a wood products and services provider based in Drayton, Ontario. Since its inception in 1996, our business has grown significantly, now operating from a 35,000 sq. ft. warehouse in Drayton's Industrial Park. We are known for our dependable service and quality products. Whether you’re interested in learning more about woodworking or have a custom cabinetry project in mind, please call us or send us an email and let’s connect. We are happy to help!
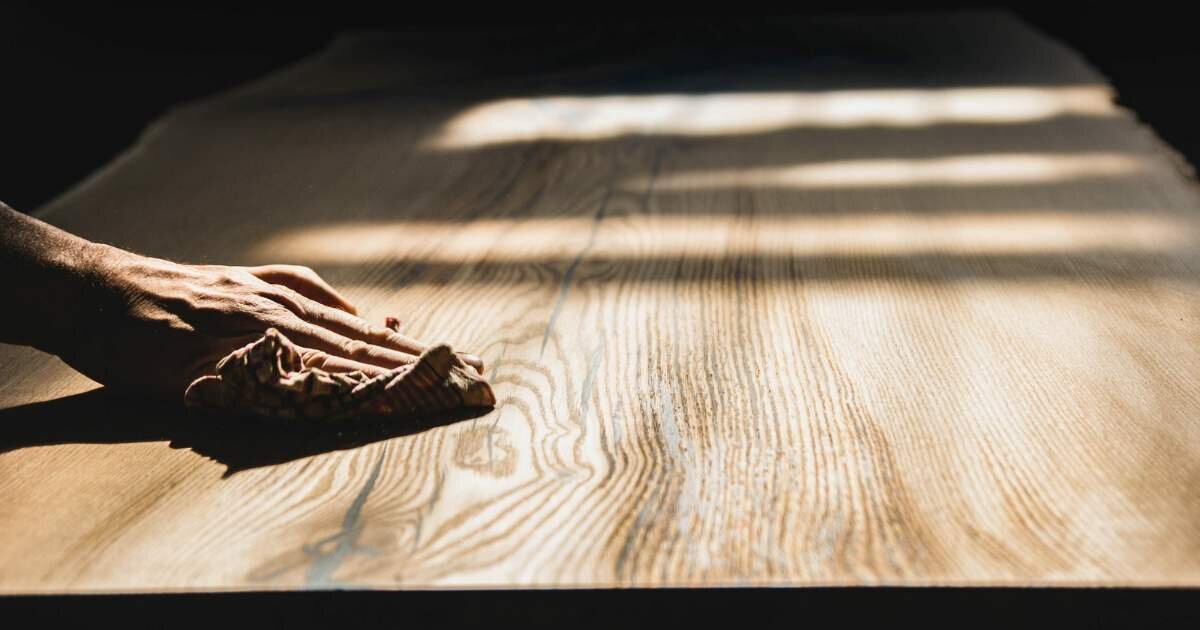
Building with Wood
Wood is popular because it’s sturdy, durable, beautiful, comes in many varieties and colours, and is easy to process.
Wood is also versatile and can be used alone or with other materials.
Moreover, it’s easy to maintain and repair compared to other building sources.
Types of Wood
We want to give a nod to woods that are also used in furniture and cabinet making.
Each of the woods described below has its own unique characteristics.
Cherry
Cherry is a hardwood with subtle grain and colours that range from reddish-brown to blond. It’s mostly used for furniture.
- Pros: Easy to mill and polish. It is a rich and deep colour even if unstained.
- Cons: The wood can darken over time (which could be a pro for you).
Pine
Pine is a lightweight wood, mostly seen in a yellowish or whitish colour, with brown knots. Crafters often use it for rustic pieces.
- Pros: Inexpensive and takes well to stain. This kind of wood tends to develop a nice yellower sheen over time.
- Cons: Being a softwood, it's prone to scratches and dents, so not a good choice for high-use pieces.
Walnut
Walnut gives different colour shades depending on which part of the tree it’s harvested from. Known for its ability to deliver well on design, walnut is typically used in any type of furniture.
- Pros: Stable wood with rich, earth-toned colour.
- Cons: High-end wood. Colour variation in a single wood board may not be suitable for some builders.
Maple
Maple is a creamy white hardwood. Maple is often chosen for heavy-use items like furniture, kitchen cabinets, and flooring.
- Pros: Affordable and durable. Because it takes dark stains well, maple can be stained to your tone preference.
- Cons: If maple is not properly sealed first, the staining can look blotchy.
Birch
Birch is a lighter coloured wood. Its higher density makes for a good choice when durability is needed. Being porous, the wood absorbs stain unevenly, leading to a blotchy appearance.
- Pros: Delivers well on finished (unstained) products.
- Cons: Staining can be tricky. No natural rot-resistant properties.
Oak Wood Cabinets Pros and Cons
Now let’s talk about the star of the blog: oak wood.
A common tree species in the Northern Hemisphere, this hardwood is known for its strength and durability.
There are more than 600 species of oak trees, but they are divided into two subspecies categories for commercial use: red oak and white oak.
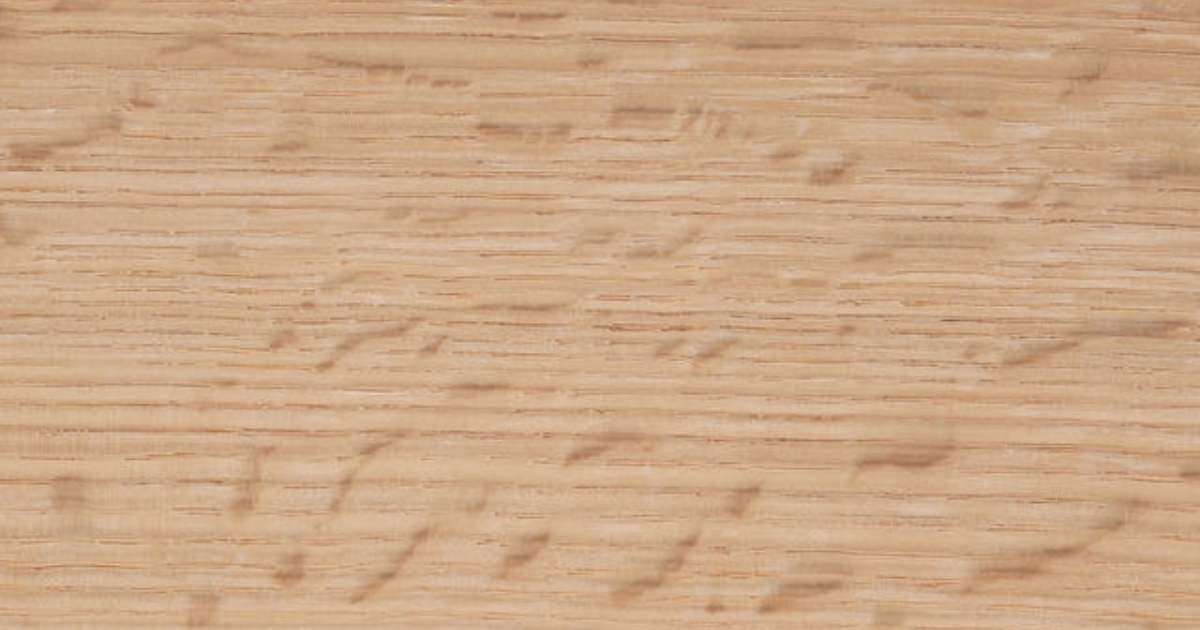
Red oak
This oak wood comes in reddish undertones. Red oak planks have heavy, prominent grains, which can hide dents and scratches well. Red oak also takes stains fairly well, allowing for a range of colour options in your projects.
Red oak is also cheaper than white oak because of its common availability.
However, it has some cons as well.
Red oak wood has poor water resistance. Red oak is not recommended for crafting outdoor furniture because it tends to warp and split more easily due to its open pore structure.
White Oak
This oak sub-family has closed pores and grains that make it naturally water and rot resistant. The wood derived from this tree is highly durable and sturdy. White oak is typically lighter in colour than red oak, ranging from a light tan to pale brown. It also takes very well to staining and painting.
If you’re using it to make large furniture, remember, it’s a heavier wood and can be difficult to move. This species of wood also tends to be more expensive.
Using Oak Wood for Cabinets
Oak wood has been a popular go-to for cabinet making for ages. It’s well-known for its timeless, classic finish and look. When sunlight hits those natural, Cathedral grains, the result is unmatched.
Oak wood has unique grain properties that make it an ideal wood choice for kitchen and other cabinets. Red oak is also typically less expensive than competitors: cherry and maple.
So why should you build with oak wood? Because it’s an amazing product that delivers high-quality results.
Pros
Excellent durability
Oak is a very durable wood. It’s strong and it’s stable. Depending on exposure to elements, oak wood can last ages, even with low maintenance.
Beautiful appearance
A most alluring feature of oak wood is its distinctive colours. If used cleverly, the resulting furniture can produce some remarkable results. The open grainy patterns natural to the wood can result in some wonderful looks in the final product.
Water-resistant wood
The closed cell structure of white oak lumber makes it great for exposure to moisture. Compared to other types of wood, oak is highly resistant to warping and shrinking, even in high humidity.
Easy to work with
Hardwood can be a bit tricky to handle, especially if you’re a novice, but not red oak. Whether you work on it with your hand tools or use machines, the results tend to be good. Red oak also responds well to steam bending, nails and screws very well.
High-quality finishes
Oak wood is amazing when it comes to finishes. You can stain it, but you can also just go straight to lacquering it and let its natural toned beauty shine.
Availability
Red oak is a popular wood and is in high demand, but the supply is also abundant, whereas white oak is in tighter supply. Also, oak trees are quite tall, so the yield from each tree can go a long way.
Cons
Cost
White oak generally grows slowly, so supply is less abundant.
As always, we are here to support you in your woodworking or renovation project. We are known for our dependable service and quality products. Whether you’re interested in learning more about woodworking or have a custom cabinetry project in mind, please call us or send us an email and let’s connect. We are happy to help!
Author
PO Box 280 Drayton, ON
N0G 1P0