The Art of Edgebanding with Wood Veneer and PVC
The Bottom Line:
- What is Edgebanding? Edgebanding covers up the unattractive edges of boards made from materials like particleboard or MDF, making them look clean and protecting them from damage.
- Types of edgebanding include real wood veneer, plastic (PVC), and melamine. There are other options, but we will cover these.
- Edgebanding comes in different thicknesses. Thin ones are good for a sleek look, medium ones are versatile, and thick ones offer extra protection for heavy use.
- Zero-joint edgebanding technology allows for edgebanding that merges perfectly with the board, leaving no gaps or visible lines for a super clean look.
- Tips for Success: Start simple, use tape if you don’t have expensive clamps to hold edgebanding in place, keep your glue and materials at a comfy room temperature, clean your tools regularly, and always choose high quality edgebanding for the best finish.
When woodworkers started using MDF in place of the pricier solid wood, we all hit the same snag: how to hide those ugly edges. And it's not just about looks, because those rough edges can chip, let in moisture, and before you know it, your hard work starts to fall apart.
Edgebanding gives manufactured sheets that finished look we are all looking for. But getting it's got to be just right, or it'll stick out like a sore thumb. You've probably noticed how even the smallest mistake can make a big difference. Once you see a gap or a bit of glue that shouldn't be there, you can't unsee it.
We all want our work to look as perfect as possible, not just for our own satisfaction, but because the folks we're making it for expect nothing less.
So, whether you're wondering what materials to choose, about the best adhesive to use, or just looking for some pointers to up your game, let’s talk about edgebanding.
Edgebanding with Hardwood Veneer
Choosing the right edgebanding is key when it comes to fine furniture, custom cabinetry, or any woodworking project that demands top-notch appearance. You want to match the wood type, of course, but also the grain pattern and colour.
Wood veneer banding comes in two types: non-glued (raw wood) or pre-glued. Prefinished has a sealer and topcoat already applied, which can save you a step if you're looking to get to the finish line a bit faster.
Craftsmen Hardwoods offers both pre-glued and non-glued veneer edgebanding.
You can also find many species of wood banding with a thin backing, like fleece or paper, to prevent it from splitting.
Alternatives to Veneer Edgebanding
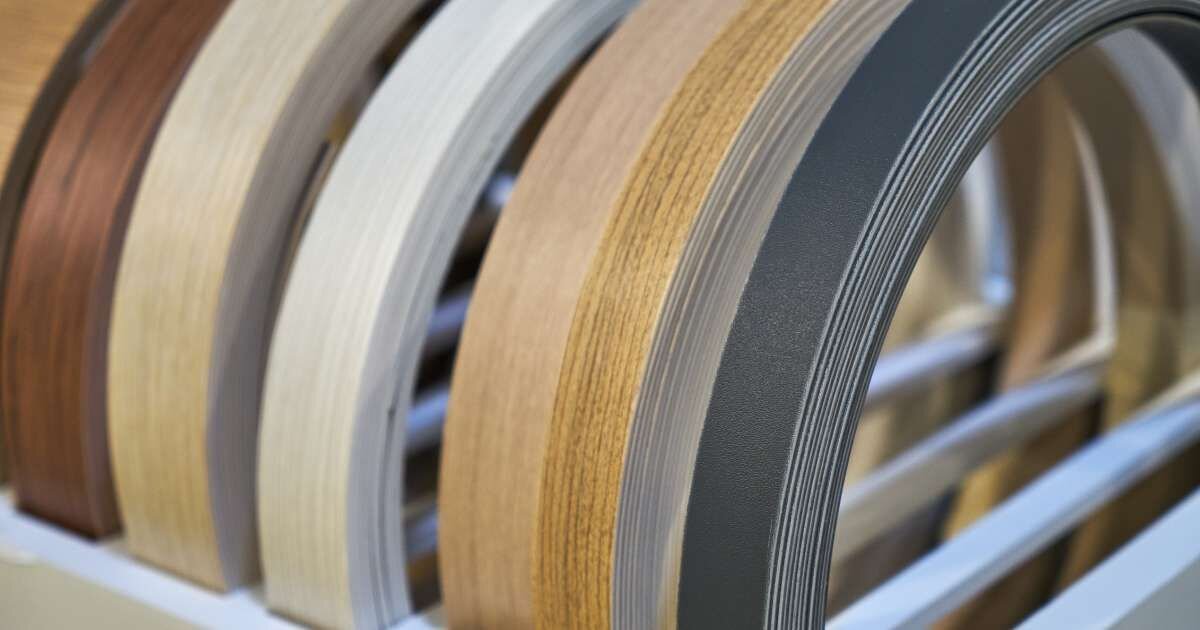
While veneer and solid wood are our go-to materials, there’s a whole world of colourful bands out there, including PVC and melamine.
PVC Edgebanding
PVC (polyvinyl chloride) is a budget-friendly option that's common in the furniture world. Its colour goes all the way through, which comes in handy when you're cleaning up those edges. PVC Edgebanding is suitable for all straight-line and contour edgebanding applications.
When you think of PVC, black or white are probably the colours that come to mind. However, PVC edgebanding is available in a huge variety of colors and textures. Look at our Benjamin Moore colour match collection—you’ll find everything from teal to navy to olive. We also have paintable PVC edgebanding which you can spray or hand-paint to match your finished piece.
Edgebanding Thickness
Edgebanding is available in a wide range of thicknesses, from as thin as 0.4mm (about 0.02 in) to as thick as 3mm (about 0.12 in) or more. Choosing the right thickness depends on the project's specific requirements and the intended outcome. Here are the general guidelines.
- Thin Edgebanding (0.4mm to 1mm): This is the most commonly used size range and the go-to when you’re aiming for that sleek, almost invisible edge. It’s perfect for furniture that’s all about finesse or if you’re shooting for that minimalist vibe. Plus, it’s flexible, bending around curves without putting up a fight.
- Medium Edgebanding (1mm to 2mm): This is your middle-of-the-road option that does a bit of everything. It's got enough muscle to protect the edges of your project but keeps things looking sharp. For most furniture and cabinetry work, this is your sweet spot. It’s reliable and versatile.
- Thick Edgebanding (2mm and above): This is what you want when you’re building something that needs to stand up to a beating. Commercial settings, high-use furniture – thick edgebanding has got it covered. It’s great for hiding those not-so-perfect edges too. The trade-off is that it’s a bit stiffer and more noticeable.
It’s also important to consider the material of the substrate, the type of edgebanding application (straight, curved, post-formed), and the desired look and design of the project. Sometimes, going thicker gives you that extra durability and hides the rough spots, but it can also change the feel and look of your piece.
Making It Stick
Whether you're sticking with the tried-and-true or looking for the cutting edge, knowing your options can make all the difference in your edgebanding projects.
Edgebanding Adhesives
Whether you're working out of a garage or running a full-scale shop, the basics of sticking edgebanding to your projects pretty much stay the same. You're mainly looking at a few types of hot-melt glue: ethylene vinyl acetate (EVA), polyurethane (PUR), and amorphous polyolefin (APO).
- EVA works a lot like the white and yellow wood glues we've all used, except it's heat-activated. This means it sets faster than those water-based glues we're used to, but it's not without its downsides. EVA creates a mechanical bond, which is strong but can re-melt under heat, something to think about depending on where your project will live.
- PUR is newer and pricier but gaining in popularity. PUR grabs onto your edgebanding and the substrate fast, creating a solid layer in seconds. Over the next couple of days, it reacts with the moisture in the air to form a super-strong, chemical bond. This bond is tough against heat and moisture, making it perfect for places like bathrooms and kitchens. Plus, it's less visible and doesn't re-melt, keeping your edges looking sharp and clean.
- APO is like EVA but doesn't handle heat or chemicals well. Where it shines is in customization, as you can adjust its hardness, stickiness, and curing time, making it great for working with paper and fabric.
Zero-Joint Edgebanding
The bane of any edgebanding job is that visible glue line that seems to attract dirt like a magnet. Zero-joint technology offers a solution.
Zero-joint edgebanding uses a pre-applied polymer layer that bonds to your board without traditional glue. Whether it's activated by laser, hot air, or NIR, this method melts the functional layer and fuses the edgeband directly to the board. Suddenly, you've got a seamless surface that looks like one piece, with no glue lines in sight.
Edgebanding Tips
Let's talk shop and dive into some edgebanding tips.
1. Start Small
If you're new to the edgebanding world, don't feel like you have to go all out with a fancy machine right off the bat. Iron-on/preglued edge tape is a great starting point. From there, you can try a portable edgebander.
As you gain experience and tackle more edgebanding projects, you might consider leveling up to a machine that doesn't just apply the band but also trims, softens edges, and even integrates with a CNC setup for a slick, almost hands-off operation.
Once you've got a couple of projects under your belt, you might consider leveling up to a machine that doesn't just apply the band but also trims, softens edges, and even integrates with a CNC setup for a slick, almost hands-off operation.
2. Save on Edge Clamps
For those of you working with solid wood edgebanding, you know the struggle of keeping it in place while the glue sets. Edge clamps can get pricey, and sometimes brad nails just aren't an option.
Grab some masking tape. Stretching a 4″ to 5″ piece over the edge every few inches can give you enough clamping pressure to secure that banding nicely, saving you from spending a small fortune on clamps.
3. Watch the Temperature
Glue-line failures are often down to not using enough glue, using glue that's too cold, or working in a space that's too chilly. The fix? Keep your glue and edgebanding in a spot that's warm, but not hot, to ensure everything bonds like it should.
4. Keep It Clean
Using an automatic or semi-automatic edge-bander? Keeping your machine clean is important. After you've got the bearings and cutters clean, consider using a product designed to prevent glue build-up. It's a simple step that can save you from a world of frustration by keeping those jams at bay.
5. Use Quality Edgebanding
Don't skimp on the quality of your edgebanding. High-quality materials make a big difference in the result. We've got you covered with wood veneer, PVC, and melamine options. Whether you're aiming for a custom look or a perfect match with your panel material, going for the good stuff will help you achieve the finish you're after.
Final Thoughts
We've covered the importance of choosing the right materials, whether you're leaning towards the natural warmth of hardwood or exploring the versatility of alternatives like PVC and shared some practical tips and tricks to help you tackle common challenges. However, we understand you may still have questions.
Craftsmen Hardwood, a wood products and services provider based in Drayton, Ontario, has grown significantly since its inception in 1996. We operate from a 35,000 sq. ft. warehouse in Drayton's Industrial Park. We are known for our dependable service and quality products. Whether you’re interested in learning more about woodworking or having a custom cabinetry project in mind, call us or contact us online. We are happy to help!
Author
PO Box 280 Drayton, ON
N0G 1P0