Machining Wood: Tips and Tricks for a Smooth Finish

Woodworking is a timeless craft that allows individuals to transform raw lumber into beautifully crafted furniture, decor, and more. The art of machining wood for a smooth finish is central to achieving a stunning result. In this blog post, we’ll share the essential techniques, tools, and tips you need to know to turn rough wood into a polished masterpiece.
We are Craftsmen Hardwoods, a wood products and services provider based in Drayton, Ontario. Since its inception in 1996, our business has grown significantly, now operating from a 35,000 square foot warehouse in Drayton’s Industrial Park. We are known for our dependable service and quality products. Whether you’re interested in learning more about woodworking or have a custom cabinetry project in mind, please call us or send us an email to connect. We are happy to help!
Step 1: Select the Right Wood
The choice of wood is the foundational step in any woodworking project. It’s akin to selecting the right canvas for a painter or the perfect ingredients for a chef. Choosing the right wood for your project is essential because it directly impacts the final outcome. Different wood species have distinct characteristics, such as grain patterns, colour variations, hardness, and workability. These characteristics influence how the wood responds to machining, finishing, and even the overall aesthetics of your creation.
For example, if you’re building furniture that requires durability and strength, hardwoods like oak, maple, or hickory might be more suitable due to their density.
Some things to keep in mind:
- Wood species have unique qualities impacting machining; hardwoods like oak, maple, birch, or hickory are dense but yield polished finishes with intricate details.
- Softwoods like pine and fir are easier to machine and suitable for beginners but may require more attention for smooth finishes.
- Understanding grain direction minimizes tear-out and enhances surface smoothness.
- Some wood species have interlocking or irregular grain patterns, posing specific machining challenges.
Step 2: Gather Essential Woodworking Tools
To transform a rough piece of wood into a smooth, usable piece, you need the right tools for the job. Here’s what you’ll ideally need and how to use them:
- Jointer: This tool is your starting point in creating a flat surface for planning. It flattens one side of your board and then can be used to make one of its edges straight. The key here is that the jointer works on one side or edge at a time, making sure the edge is perfectly perpendicular (at a right angle) to the flat side. This step gets your board ready for everything that follows.
- Thickness Planer: After the jointer, you use the thickness planer. It’s designed to flatten the other side of the board, making it smooth and parallel to the first side you worked on with the jointer. The planer ensures your board is the same thickness all the way through. Consistency in thickness is important for joinery and a consistent appearance across woodworking projects.
- Table Saw: With both sides of the board flattened and smoothed, the table saw is your tool for making precise cuts. You’ll use it to trim your board to the exact dimensions you need. The table saw is invaluable for its ability to make clean, straight cuts, ensuring that every piece fits perfectly where it’s supposed to in your project. It can also be used for joinery tasks such as dadoes, rabbets, and tenons
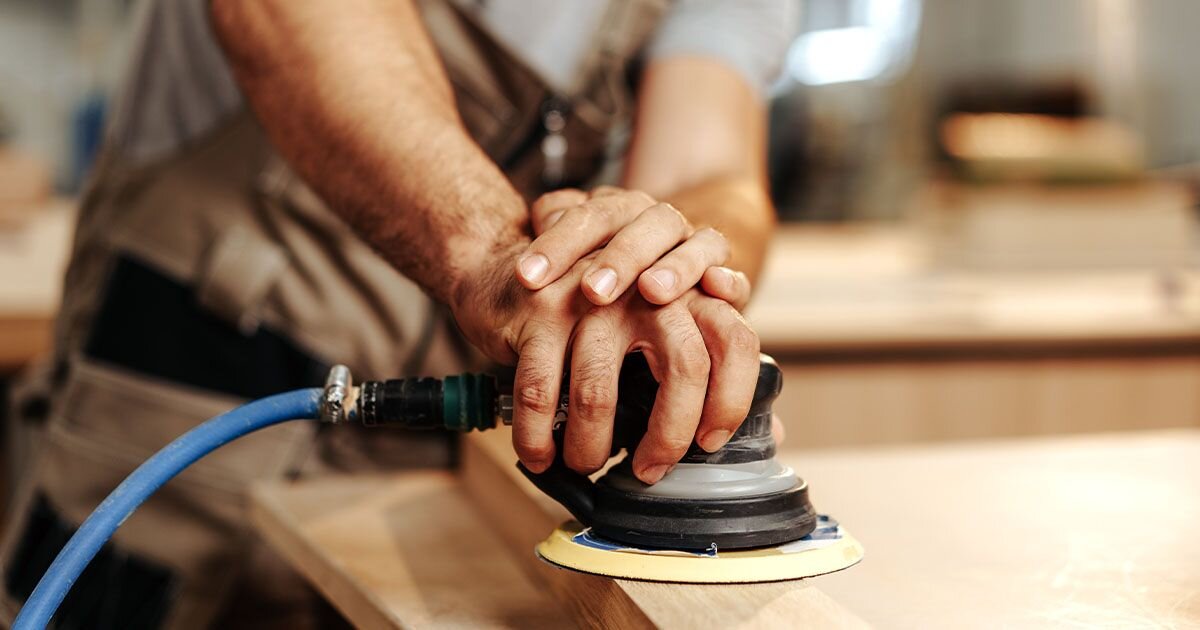
- Sanding Tools (Block Sander, Orbital Sander, etc.): Finally, to achieve a smooth finish, you’ll need to sand your wood. You can choose between a manual block sander for detailed control or an orbital sander for quicker, more even sanding over large areas. Starting with a coarser grit and moving to finer grit sandpaper (removing dust between grits) is key to removing any imperfections and preparing the wood for finishing, like painting or staining.
Step 3: Master Machining Techniques
When learning woodworking, there are a few techniques that are worth mastering — planning, jointing and sanding.
Each technique plays a crucial role in achieving a smooth finish.
- Planning eliminates irregularities
- Jointing ensures precise and squared edges
- Sanding smooths out minor imperfections and prepares the wood for staining or varnishing
Understanding their applications and nuances empowers you to control surface texture and appearance, producing a polished and professional outcome.
Step 4: Prepare the Surface
The next step is surface preparation. This step ensures the wood’s surface is perfectly smooth and ready for finishing touches.

Here’s a breakdown of what this might involve:
- Inspecting the Wood: Start by carefully checking the wood for irregularities, such as warps, twists, or knots. Use tools like a straightedge or winding sticks to identify areas that aren’t flat or have high spots. This inspection helps you understand what needs to be addressed to achieve a smooth surface.
- Flattening and Smoothing: If you find any high spots or minor unevenness, use a jointer to flatten one face of the wood, making it perfectly level. A jointer is also used to square up one edge of the board, ensuring it’s at a right angle to the flattened face. This step creates a reference surface for further machining.
- Achieving Uniform Thickness: Once you have a flat and square reference face and edge, use a thickness planer to make the opposite face of the board parallel to the first. The thickness planer ensures the board is of uniform thickness and smoothness across its entire surface.
Addressing Common Issues
Dealing with common wood surface issues is vital for a smooth finish:
- Knots: Due to their density, knots can be challenging to machine smoothly. Techniques like careful hand-planning can address this issue. Using a knot-filling epoxy may help the knot stay together.
- Grain Direction: Understanding the direction of the wood grain helps minimize tear-out and achieve smoother cuts. It’s important to adjust your machining techniques accordingly.
- Surface Imperfections: Surface imperfections like cracks, dents, or gouges can be addressed through techniques such as filling, patching, or selective sanding.
Step 5: Sanding
It’s about refining and perfecting your wood piece before the final finish. Here’s what sanding accomplishes:
- Eliminating Imperfections: Sanding primarily aims to smooth out the wood surface. Whether it’s rough patches, marks left from the milling process, or minor unevenness, sanding with the right grade of sandpaper makes the surface smooth and ready for the next step.
- Shaping and Dimensioning: While sanding is often seen as a finishing touch, it also plays a crucial role in fine-tuning the shape and dimensions of your workpiece. Careful sanding can adjust contours and edges, bringing your piece to its final form.
- Preparing for Finishes: A smooth, sanded surface is essential for any finish to look its best. Sanding opens up the wood’s pores, making it more receptive to stains, varnishes, and paints. It ensures that the finish applies evenly, enhancing the natural beauty of the wood and providing lasting protection.
- Refining Edges and Joinery: In projects involving multiple pieces of wood joined together, sanding is critical for achieving a unified appearance. It smooths the joints and edges, making the transitions between pieces seamless and visually appealing.
Sanding is about attention to detail. Starting with coarser grits to address the larger imperfections and gradually moving to finer grits creates a surface that’s pleasing to touch and aesthetically aligned with the high standards of craftsmanship in woodworking. It’s this careful progression through different grades of abrasives that lays the groundwork for a beautifully finished piece.
Different Sandpaper Grits and their Applications
Coarse Grits (40-80): These are used for initial material removal, particularly when dealing with rough or uneven surfaces or for shaping wood.
Medium Grits (100-150): Ideal for refining surfaces and removing scratches left by coarser grits or milling/machining. They prepare the wood for finer sanding.
Fine Grits (180-220): Used for final sanding before finishing, fine grits provide a smooth surface and prepare the wood to accept stains and finishes evenly.
Extra Fine Grits (320 and above): These very fine grits are employed for ultra-smooth finishes and polishing wood surfaces.
Proper Sanding Techniques for Optimal Results
- Keep Even Pressure: Apply even pressure across the workpiece to avoid creating uneven surfaces or over-sanding in one area.
- Sand with the Grain: Always sand parallel to the wood grain to prevent cross-grain scratches and maintain a consistent finish.
- Change Grits Gradually: Progress through the grits systematically, starting from coarser grits and moving to finer ones. This ensures a smoother transition and minimizes visible scratches.
- Use Sanding Blocks: When hand sanding, employ sanding blocks to maintain flatness and prevent handprint impressions on the wood.
- Clean Between Grits: Remove dust and debris between grit changes to prevent them from scratching the wood surface.
- Consider Contour Sanding: For curved or detailed surfaces, use flexible sandpaper or specialty sanding tools designed for contours.
Step 6: Finishing Touches
Explore a range of wood finishing choices, including stains for colour, varnishes for durability and sheen, and oils for a natural, matte finish.
You can also practice various application techniques such as sanding between coats, and troubleshooting tips to ensure a smooth, professional-looking finish that enhances both the wood’s appearance and durability.
We are Craftsmen Hardwoods, a wood products and services provider based in Drayton, Ontario. Since its inception in 1996, our business has grown significantly, now operating from a 35,000 square foot warehouse in Drayton's Industrial Park. We are known for our dependable service and quality products. Whether you’re interested in learning more about woodworking or have a custom cabinetry project in mind, please call us or send us an email to connect. We are happy to help!


